Connect to a Machine
If the system was purchased as a complete package, it may be configured for automatic connection. In this case, the machine will connect during startup.
After reviewing the I-Mark ribbon interface, the next step is to connect the marking machine to the IM200 controller.
Procedure

- Select the Marking tab located on the ribbon at the top of the screen.
- Click Connect to Marking Machine.
- The system will verify network status and initiate pairing between the marking head and the IM200 controller.
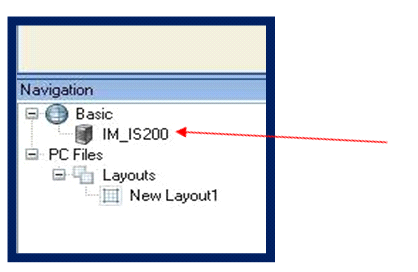
- When the connection is successful, a green check mark will appear next to the machine ID in the left navigation pane (e.g., IM-M75, IM-M125, IM-M200).
Select the machine ID to open the controller window.
- The machine control page will open. This is the active control interface for the connected marking system.
Control Page Functions
The control page allows you to:
- Download marking programs to the machine
- Adjust machine settings
- Execute marking operations
Once connected, the system is ready for layout creation and program execution.
Troubleshooting
If the machine does not pair:
- Verify network connections.
- Confirm the controller and marking head are powered on.
- Check and modify the IP address configuration as needed.
- Verify you are using matching hardware and matching software.
If no systems are available, check the following issues:
- Is the computer that I-Mark is running on connected to the network?
- Are the Marking Systems connected to the Network?
- Are the Marking Systems on?
- Have the Marking Systems been properly configured/mapped?
Created with the Personal Edition of HelpNDoc: Elevate your documentation to new heights with HelpNDoc's built-in SEO