Step 3 Creating a Layout

After the marking machine has been detected and connected, create a new marking layout.
A marking layout is the visual representation of the data the machine will mark. The content placed in the layout window will be reproduced exactly on the material.
These files are not automatically created nor saved. The filename on the Main Work Area tab will be followed by an asterisk if the file has note been saved in its current state.
When the file is saved the file is located in the data directory under the I-Mark program files. The extension name is .ctml
Procedure
- Select the Home tab on the ribbon.
This icon is located in two places: the Orb Menu and the Home Menu Ribbon. This command will create a blank layout in the current workspace.

- Click Create New Layout.
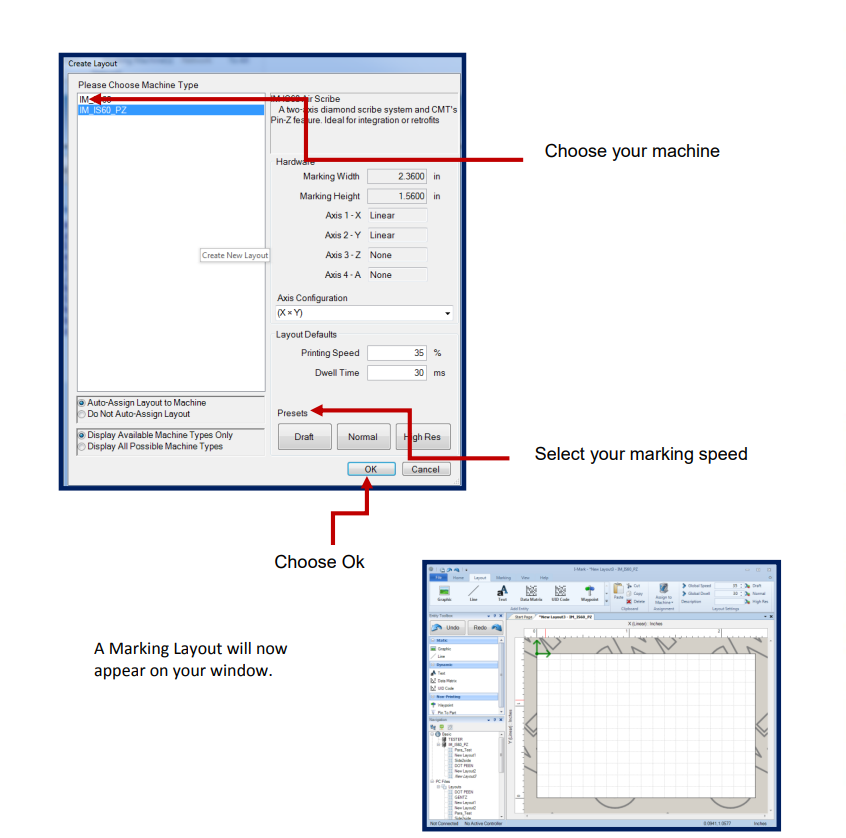
- In the pop-up window, select the appropriate machine type.
- In most cases, only one machine option will be available.
- If multiple machines are listed, select the machine intended for marking.
- Do not modify the hardware configuration settings.
Do not change:
- Marking width
- Marking height
- Axis configuration
These settings are automatically configured based on the selected machine – DO NOT TAMPER WITH.
- If the marking application requires custom parameters, adjust speed and dwell time as necessary according to application requirements.
- Select the desired preset:
- Draft – High-speed marking for mock-ups with reduced precision.
- Normal – Balanced speed and quality for standard production marking.
- High Resolution – Reduced speed for maximum clarity and precision.
- Select OK to create the layout.
The new layout window will open and is ready for content creation.
You will notice that the I-Mark program has already moved to the Layout ribbon for you
Created with the Personal Edition of HelpNDoc: Easily create PDF Help documents